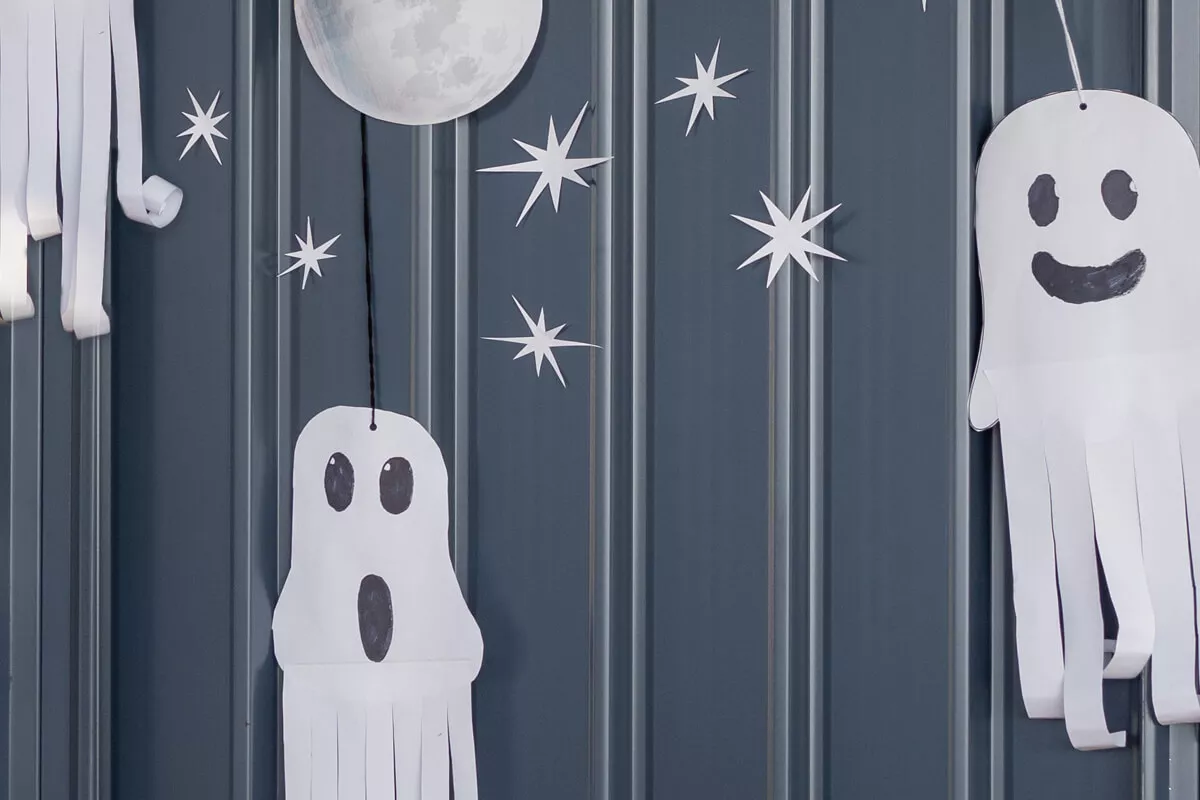
Our final Halloween decoration that we’ve made this year is the hanging ghost! This is very easy to make, and only has a few steps! It does involve some cutting though so we suggest assisting little ones. We’ve made the templates so all you need to do is download them and print them off, or you can do it from scratch. If you want to make something that doesn’t involve any scissors then try our lollipop ghosts which are great for handing out to trick or treaters!
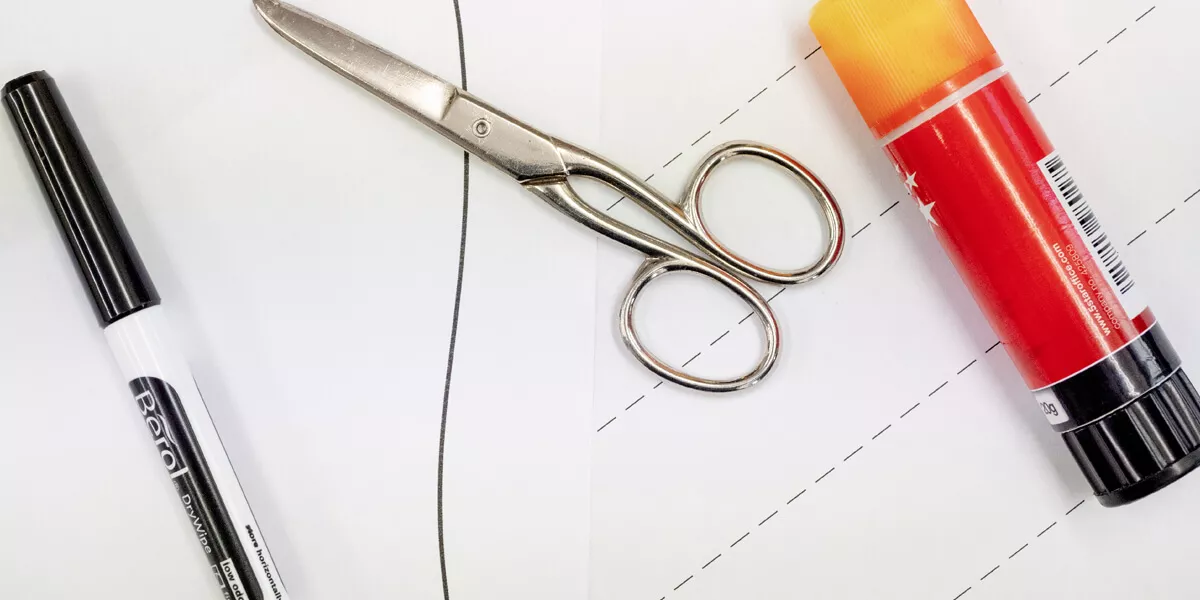
Items Needed
• Paper Templates
• Scissors
• Black felt pen
• PVC/Prit-Stick Glue
Instructions
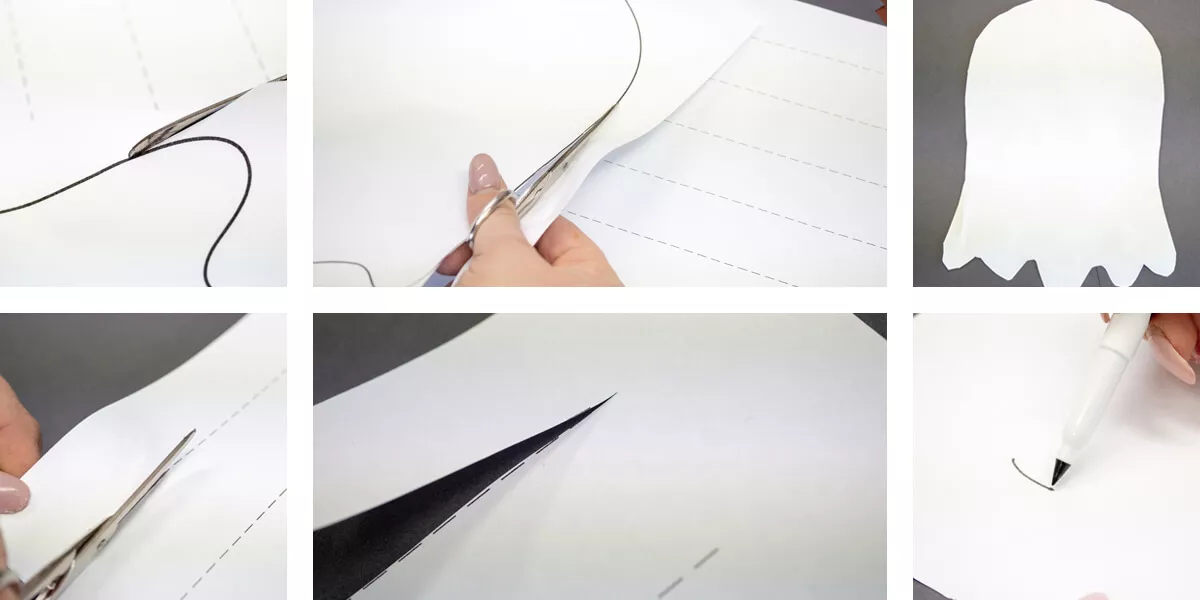
1. Take the template of the ghost body and cut around it.
2. Next, take the template of the ghost tail and cut up the lines leaving 2 cm at the top of the page (where the lines go up until)
3. Take the bottom half of the ghost and in those two cms that haven’t been cut at the top place either PVC Glue or prit-stick all the way along the paper. Then stick it to the bottom half of the ghost body (see photos for reference). Leave that to glue dry.
4. Now take your black felt tip pen and roll one the strips of paper around it to finish off the bottom half of your ghost. You can try different lengths to make the flowy effect.
5. Finally. it’s time to draw your ghost’s face, make sure you give it some eyes and a nice big mouth! Try some different styles if you’re making a few!
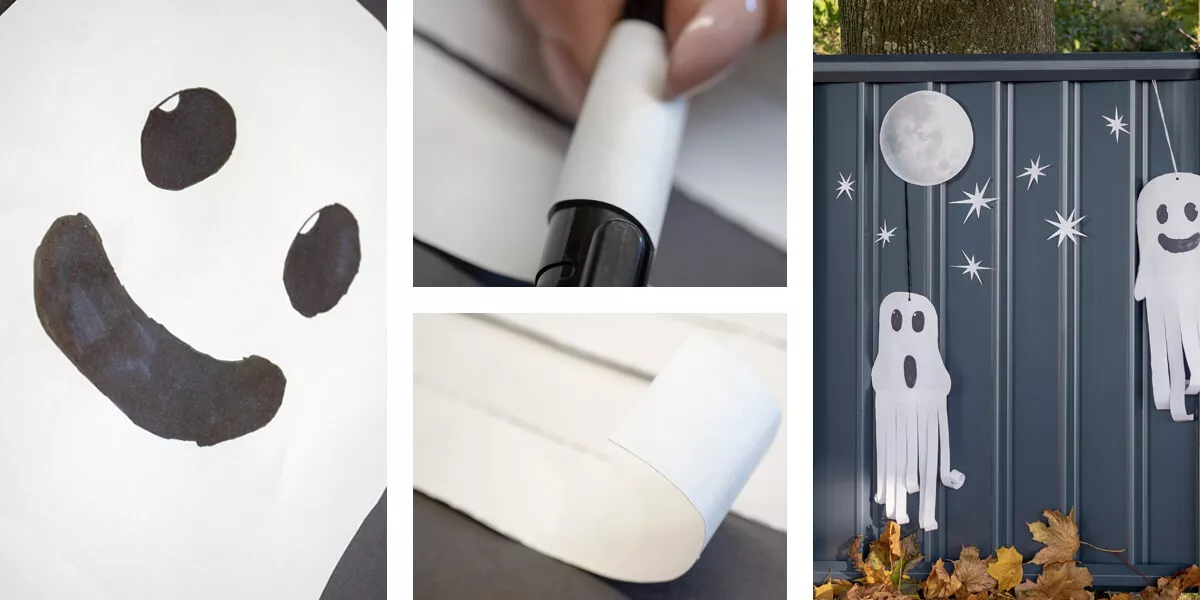
Now your hanging ghost is complete, you can make a hole in the top with a hole puncher, or sellotape some string to the back of it, and hang it off your railings, door, windows or fence! We hung ours on a blue ColourFence and added some cutout stars and a moon! If you give this a go then please do share your photos with us – you can find us on Facebook & Twitter!